Has your mascara ever dried out before it has run out or expired? These are two ways that you can you can easily revive it!
First add 2-3 drops of saline solution eye drops into the tube, recover, and roll it between your hands. Magically your mascara will be usable again.
Don’t have any saline solution eye drops? Put your tightly closed dried up mascara tube into a mug of hot water for 3-5 minutes. Check your mascara, most likely it will be nice and smooth again, if not reheat your water and let it sit another 3-5 minutes!
Let’s face it, about this time of year, if you live in the North East like I do you are probably a bit Vitamin D deficient! While I can’t help you with that, I can give you a few tips on how to look like you have just returned from a stay at the beach.
Adding life to your face can be as simple as using bronzer!
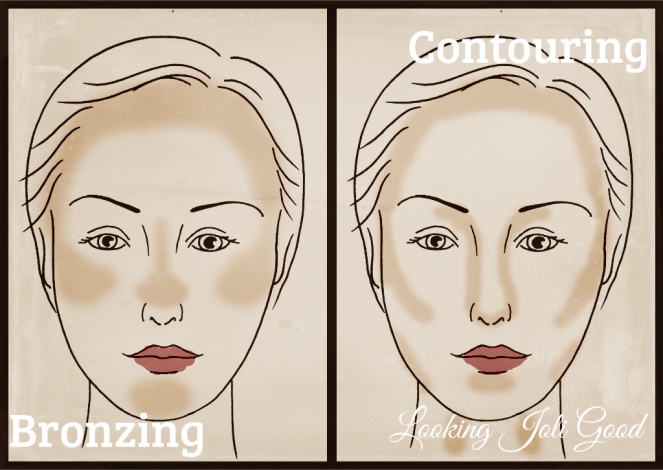
While using bronzer to add color is a simple step, proper application isn’t always as simple. Keep in mind that the goal is to add color, but not to give the appearance of an all over tan. Bronzer should be applied where the sun would naturally hit the face, the forehead, the cheeks, and the nose.
Bronzer is applied after your foundation and concealer have been put on. Choose a bronzer that works with you skin tone. To apply find the apple of the cheek by smiling and lightly dust your cheeks with the bronzer. Then using a wide brush blend up and blend down. You can put blush on top of it and even a little bit of shimmer and highlight on top as well.
Don’t confuse bronzing your face with contouring. These are two different techniques.
While bronzer is probably the quickest way to add some color and life to your face, a little bronzer can go a long way, remember that you can always add more, so start off lightly and build it up as needed.
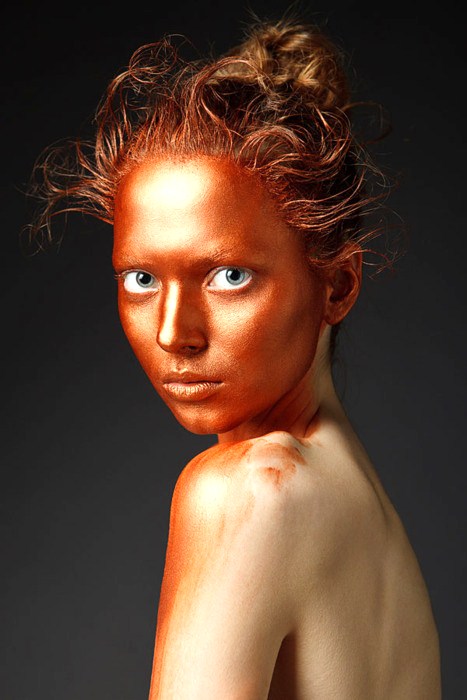
This is not the effect you are wanting to achieve with bronzer! (This is not my photo, I just googled bronzer overload and this was one of the first pictures that came up. )
Lining the inner rim of the eye is beautiful but it is a bit high maintenance. Unfortunately, you will always have to touch it up as needed throughout the day, but there are a few ways to extend the wear time of the eye liner when lining the water line or tight lining. First of all, always use a waterproof liner in the waterline. (My all time favorite is Scandaleyes waterproof kohl liner by Rimmel.) Secondly, before applying the liner, use a q-tip cotton swab to dry off the area you are about to line. Q-tips are perfect for using throughout the day as well to clean up the buildup that often collects in the tear ducts. (I hate when that happens!) Thirdly, if you tend to have very watery eyes, you may want skip lining the waterline all together, but if not, apply the liner to your waterline with your head tilted back with your mouth closed while breathing deeply through your nose. This helps those tears to go into the sinuses and not out onto the eyes and down the cheeks.
Let me know if you try out this tip and if it works for you!
Sometime making little changes can make a big difference in you makeup/beauty routine.
Here is another tip for Tip Tuesdays…
When applying eyeshadow into the crease, instead of looking straight on into the mirror, tilt your head back and look down into the mirror. Just moving your head into this different position will help you to visualize the eye bone better giving you a better guide where to add your crease color.
This tip is also helpful for when you are applying eyeliner as well as false lashes. You can better visualize where you want to add the liner and the lashes by tilting your head back and looking into the mirror at this different angle.
If you try out this tip, I’d love to hear how it works for you!
I’m going to be starting a new series called…Tip Tuesdays!
I hope to give you some little tips and tricks that help to make a big difference in your daily makeup/beauty routine!
Tip #1: If you want your eyeshadow to blend more evenly and easily without creasing or fading, you need to try this tip:
Working one eye at a time, prime your eyelid with an eye primer, paint pot, or even use concealer or just your foundation. Then immediately set with a translucent powder.
When you go to apply your eye shadows you will notice how much more easily they will apply.
This little step will create a smoother canvas on your eyelid to lay down your colors. You’ll be amazed at how even cheaper, harder to work with shadows will blend more easily.