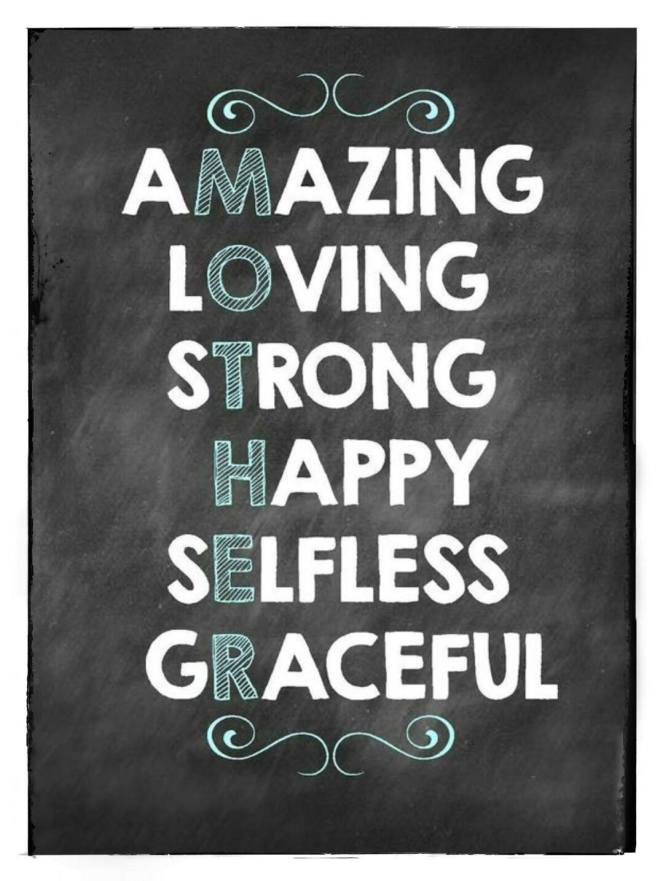
This week I am going to be talking about…Multi Masking!
I don’t know about you, but all the parts of my face are not created equally! It is kind of annoying! While my forehead and cheeks are very normal my nose is dry and my chin always seems to be the place to break out.
This is where multi masking comes into play! Using a few different types of face masks as the same time you can get what each area of your face needs. By applying a clarifying mask to my chin and a moisturizing mask to my nose and a soothing mud mask to my cheeks and forehead area, I am giving each each part of my face what it needs all at the same time.
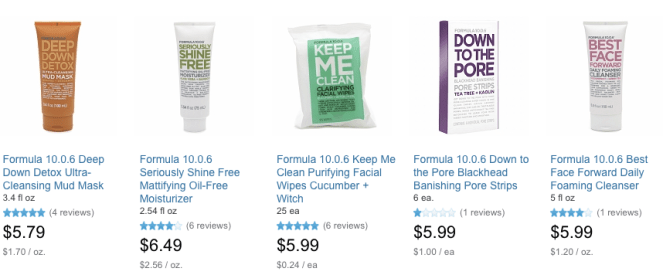
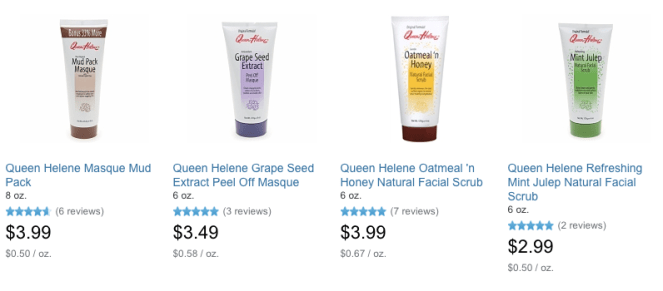
There are so many great masks available! I really like the Formula 10.0.6 mud masks. I’ve seen them at both Ulta and at Walgreens.com. They’re great and only around $6-7. Added bonus they smell great and the packaging is super cute too! I also recommend the Queen Helene line of masks two of my favorites are the Grape Seed Extract Peel Off Masque and especially the Mint Julep mask. These are both less than $4.
Hope you enjoy this weeks tip!
*This post is not sponcored. Although I wish it were ;-).
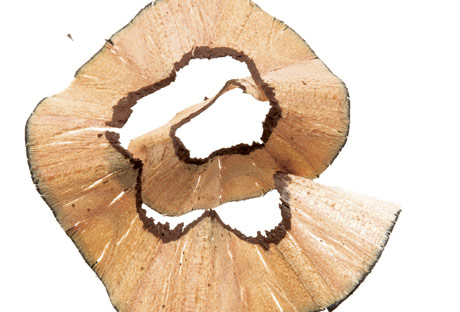
I seriously hate it when I am trying to sharpen a makeup pencil and it keeps breaking!!! (I hate wasting the product in a sharpener!) To prevent this from happening I put it in the freezer 30 minutes before I want to sharpen it. This simple trick helps to makes the tip less likely to crumble and break. If you are going to use the liner right after sharpening just soften it up a bit by drawing a quick line or two on the back of your hand.
I tend to set aside a time to sharpen all my dull linersat the same time, so I will throw them all into the freezer at the same time and set a timer for 30 minutes and then sharpen them all at once
Let’s face it, about this time of year, if you live in the North East like I do you are probably a bit Vitamin D deficient! While I can’t help you with that, I can give you a few tips on how to look like you have just returned from a stay at the beach.
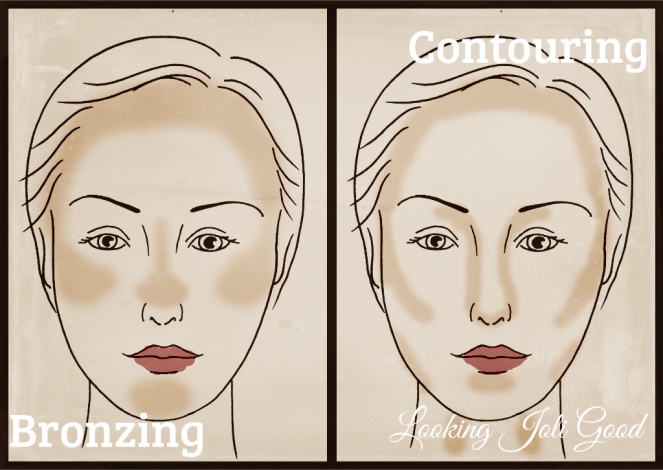
Adding life to your face can be as simple as using bronzer!
While using bronzer to add color is a simple step, proper application isn’t always as simple. Keep in mind that the goal is to add color, but not to give the appearance of an all over tan. Bronzer should be applied where the sun would naturally hit the face, the forehead, the cheeks, and the nose.
Bronzer is applied after your foundation and concealer have been put on. Choose a bronzer that works with you skin tone. To apply find the apple of the cheek by smiling and lightly dust your cheeks with the bronzer. Then using a wide brush blend up and blend down. You can put blush on top of it and even a little bit of shimmer and highlight on top as well.
Don’t confuse bronzing your face with contouring. These are two different techniques.
While bronzer is probably the quickest way to add some color and life to your face, a little bronzer can go a long way, remember that you can always add more, so start off lightly and build it up as needed.
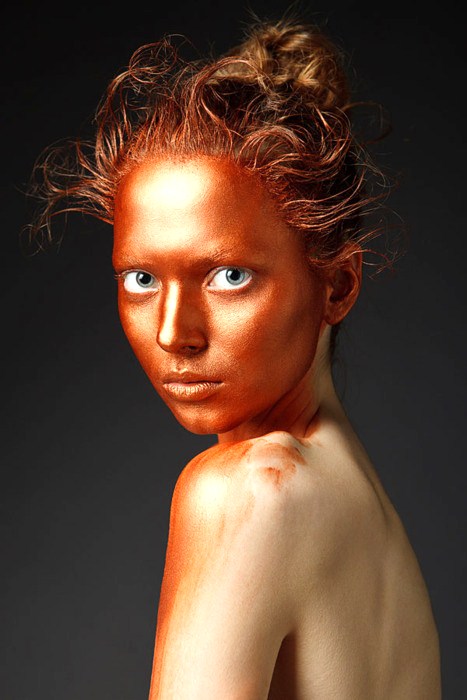
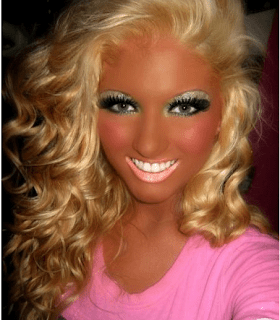
This is not the effect you are wanting to achieve with bronzer! (This is not my photo, I just googled bronzer overload and this was one of the first pictures that came up. )
Here is just another reason to love Target…Essence Cosmetics is now being sold at Target!!!
Previously Essence was just sold online and at Ulta and Fred Meyer stores, but now it can also be purchased at Target as well! The line has so many great items and now it even includes some Target exclusives. You can check out the full line that is available at Target by clicking HERE.
You can purchase directly online or pick up in-store. Some stores already have it on display now, while other “select stores” across the country should be getting it soon. I haven’t seen it yet in my local Target, but I am excited for it to arrive.
Everything is so reasonably priced, with eyeshadow and contour palettes less than $10 all the way down to lip and eye liners for just around $2.
Some of my favorite Essence items are their lip liners and lipsticks. A while back I wrote a post featuring their lipliners which if you are interested you can read by clicking HERE.
I have heard really great things about their matte sun club bronzers and silky touch blushes. I have also heard that the All About Matt! Fixing Compact Powder is a dupe for the Make Up For Ever HD Pressed Powder. ($4 compared to $36!) I am already planning to try out those as well as the I Love Extreme Waterproof Mascara. When I do, I’ll let you know what I think!
I would love to hear what your favorite Essence products are? What are you looking forward to trying out? Have you ever tried anything out that I should definitely buy? Or have you ever tried anything out that I should definitely avoid? I would love to hear. Let me know if the comments below!
I found this article on Real Simple and thought that it was so good that I wanted to share it with all of you here on Looking Joli Good.
Nailing your look every time comes down to one thing: knowing how to play up your exact eye shape. Here, how to identify yours, what to use, and exactly where everything should go.
By Jenny Jin
It’s always difficult to tailor your makeup to your face shape or eye shape when you’re not exactly sure what that shape is. To make your life easier, we came up with four visuals to help you determine your match. Each three-step tutorial features a basic look, but you can swap in darker shadows, add fake lashes, or layer on mascara for a more dramatic and party-ready style. Once you master these, you’ll be set for the holidays—and every day.
Read the original article for yourself by clicking HERE.
Maybe she’s born with it?… In my case, nope, it is most likely Maybelline!
So many of my favorite products are from Maybelline. The brand as a whol is one of my favorites. When it comes to foundations and mascaras, they know what they are doing!
They have recently come out with several new products! I’ll list them in the order that I would apply them if I were to be putting my makeup on.
First up face…
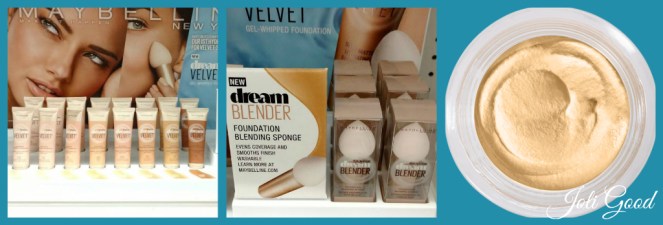
Dream Matte Mousse Foundation.
Maybelline claims that this foundation is ideal for normal to oily skin and provides medium to high coverage. It comes is 12 shades. They suggest that this foundation be applied with their new Dream Blender. This Dream Blender looks like a beauty blender with a handle. Not too sure about that, but maybe it is worth giving a try.
Dream Velvet™ Foundation
This is their first “hydrating matte foundation.” It is supposed to be for normal to combination skin,with medium coverage giving a soft-matte finish. They claim that the “unique gel-whipped formula” will keep skin hydrated for 12 hours. Once again Maybelline suggests using the Dream Blender to apply this foundation.
Face Studio Master Contour 3-step face contouring kit. This contour palette is available in 2 shade combinations, light to medium 10 and medium to deep 20. Each palette includes three color shades a contour/bronzer, blush and highlight. Maybelline claims that this palette will make contouring the face easy. In my opinion the “contour” shade in the light to medium palette looks like more of an orange like bronzer shade than a true gray toned contour shade. Ok, seriously, does anyone ever use the brush that is included with these things?! Why do they even waste the supplies that it takes to make these little pointless brushes?
Moving along to the eyes…
The Rock Nudes Palette This 12 shade palette is supposed to be easily broken down into quads, trios and duos. It is supposed to “deliver the ultimate smoky rock nude look and bring out your inner rockstar.” Hmmmm, I personally don’t think that I have an inner rock star…
Did any of you get any of the other “Nudes” Palettes that Maybelline released this past year? Although many of the previous palette shades looked beautiful, due to all the poor reviews that I read and watched, I personally didn’t purchase any. Not sure if I would venture to buy this one either.
Eyestudio Lasting Drama Waterproof Gel Pencil
This is Maybelline’s first gel eyeliner in a pencil form. This eyeliner comes in 10 different shades. They claim that it is and ultra smooth waterproof formula that is long-lasting with up to 16 hours of wear.
Lash Sensational Luscious Waterproof Mascara
Maybelline’s original Lash Sensational Mascara quickly became a cult favorite. I have purchased it, but it is still in the package and I haven’t tried it out yet. Now available in a “luscious waterproof” formula, I am excited to see if it lives up to the hype of the original. The brush is supposed to “envelop lashes with a precious oil-infused formula from root-to-tip” while causing the lashes to fan out.
I don’t know how a waterproof mascara can also have oils infused in it, but I guess I will find out if I use it. Although, I may just wait until I hear some reliable reviews before I rush out and buy it for myself…
Maybelline Eye Studio Brow Drama Pomade Crayon This is their first ever brow pomade crayon available in 4 shades. According to Maybelline you can get the perfect brow in just one easy sweep that both sculpts and tames! If only everything in life were that simple…
Last but not least…Lips…
Color Sensational Vivids Lipcolor Available in 10 different matte, “bold, vivid shades, that glide easily onto the lips”. The formula is supposed to give full color coverage and be comfortable and creamy with a smooth application that dries to a “velvety” matte finish. Clearly Maybelline is loving the word “velvety” this season. I have seen a few reviews that say that these vivid matte lipcolors are not actually a true matte liquid lipstick, but actually more of a liquid cream. It seems as if they never actually fully dry down and become matte. I personally don’t usually like matte liquid lipsticks. I want my lips to always be shiny, slick, and glossy. That being said the chances of me trying these out is pretty much next to none. I have to say though, the color selection is really pretty.
Available in 10 vibrant, matte shades in a range of colors from Nude Flush to Electric Pink to Vivid Violet.
Do you love Maybelline like I do? Are you planning to try out any of these new products? Let me know in the comments what you have tried and if it is worth picking up.
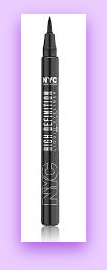
Did you know that you don’t have to spend a lot of money to look fabulous?! You really don’t. While it is true that sometimes high end product are better quality and easier to use, that is not always the case. As it is with NYC’s High Definition Liquid Liner! This liner costs only $3.99. I have used other more expensive and higher end liquid liners and yet I always find myself reaching for this one instead of the other higher priced liners.
It is easy to use and comfortable to hold. What I like best about this liquid liner from NYC is you can get a flawless even line with its ultra-thin felt tip that glides on super smoothly and dries quickly. Try it out for yourself and you will see that you are Looking Joli Good and saving some extra cash!
What does the NYC Website have to say about the HIGH DEFINITION LIQUID EYELINER?…
The ultimate mistake-proof application! With NYC’s High Definition Liquid Liner you can forget those messy traditional liquid formulas that require a steady hand. The chic, liquid pen delivers smooth, fast-drying results whether you want a super-thin modern line or a thick, full-blown retro cat-eye flick. And the formula is smudge-proof and long-lasting—up to 10 hours of wear! HIGH GLAM WITH MINIMAL EFFORT. UBER-BLACK PERFECTION IN AN INSTANT!
Ultra-fine felt tip liner
Rich, intense color. Long wearing
Creates precise line from soft to dramatic
Safe for use by contact lens wearers
Long wearing up to 10 hours
Ophtamologist tested
Key Ingredients:
Highly intense pigments
Duo of film-forming polymers for long wearing properties


 I have heard really great things about their matte sun club bronzers and silky touch blushes. I have also heard that the All About Matt! Fixing Compact Powder is a dupe for the Make Up For Ever HD Pressed Powder. ($4 compared to $36!) I am already planning to try out those as well as the I Love Extreme Waterproof Mascara. When I do, I’ll let you know what I think!


 Face Studio Master Contour

 Lash Sensational Luscious Waterproof Mascara