Lifestyle · Love and Life

Mr. Big Might Want to Be with You, But I Sure Don’t

Music has an uncanny ability to transport us back in time, reviving memories both joyful and painful with just a few familiar notes. I hadn’t heard To Be with You by Mr. Big in years, but the moment it played, I was instantly transported back to an experience from my childhood that left a lasting impression. Although I genuinely enjoy the song, it is forever tied to that memory.

I was around eleven years old when my neighbor had a birthday party at a skating rink. She was closer to my older sister than to me, she wasn’t able to go to the party for some reason or another, and I wasn’t particularly eager to go alone. However, as was often the case back then, my sister guilted me into attending in her place. I reluctantly went, already anticipating an uncomfortable time. As I expected, I knew hardly anyone there, and while I was only mildly friendly with the birthday girl, I was certainly not part of her close circle of friends.

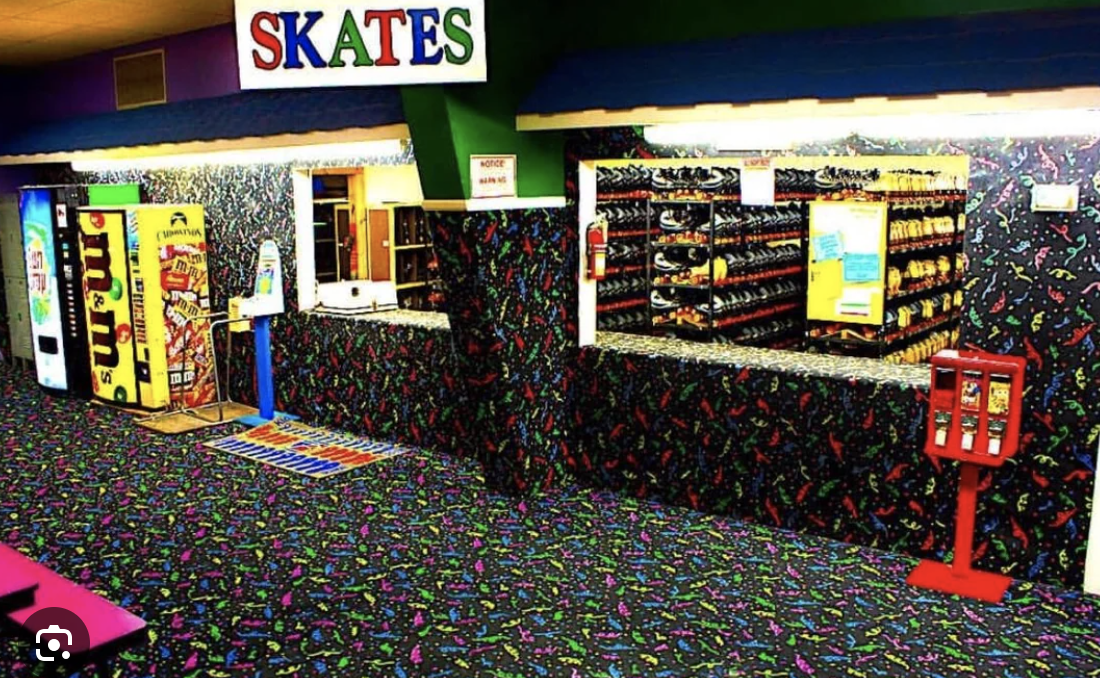
The party proceeded as these events typically did, everyone laced up their skates and took to the rink. Loud music played over the speakers and everyone seemed to be having a great time. The birthday girl was surrounded by her friends, laughing and enjoying herself, while I glided around unnoticed, feeling out of place. Still to this day I remember the lump forming in my throat, the kind that signals an impending cry, but I willed myself to hold it together. No one was overtly mean to me (…yet), but the absence of any acknowledgment made me feel invisible, which in some ways was just as painful. Over the speaker Mr Big sang “Why be alone when we can be together, baby?” But in that moment, surrounded by people yet feeling completely isolated, the lyrics felt more like cruel irony. 

Then came the moment that cemented this memory in my mind… We had gathered around to sing Happy Birthday and enjoy cake and ice cream. As I moved my arm, I accidentally knocked the plate of the birthday girl’s grandmother, causing her piece of cake to drop onto the floor. What followed was a shocking outburst. I can still picture it clearly in my mind as if it happened yesterday, the woman screamed at me as if I had committed an unforgivable offense. Her reaction was wildly disproportionate to the situation, berating me in front of everyone over a simple accident. While I don’t recall whether I ended up crying, I do remember the overwhelming embarrassment and shame that washed over me.

I don’t know if as a child I knew that her reaction was more about her own issues than about me or the fallen dessert? There was no excuse for speaking to a child that way, especially in a public setting over something so trivial. It wasn’t the first time I had witnessed an overreaction from this woman, she often spoke to her grandchildren that way, but it was the first time I had been the target of her misplaced anger. As far as I can remember it was the first time I had ever been the target of anyone’s misplaced anger, which is probably why it sticks out so starkly in my memory.

Mr Big To Be With You | lookingjoligood.blog

Decades later, when To Be with You played, I was instantly transported back to that moment, the skating rink, the loneliness, the humiliation. And yet, surprisingly, I really like the song. It’s strange how emotions and memories become intertwined with music, shaping our connection to it in ways we don’t always understand. Though the memory itself is painful, I may have felt small and invisible that day, but I emerged a stronger person. I personally would never speak to anyone that way, especially not a child. I have also learned that other people’s misplaced anger and overreactions are reflections of them, not of me.

It is so interesting how music has a way of stitching together moments of the past with the present. For people to truly want “To Be With You,” kindness and warmth matter far more than simply being present. Situations like what happened that day have taught me that making others feel included and valued is what truly brings people together. 

Laura lookingjoligood.wordpress.com
Love and Life

Merry Christmas to All and to All a Good Night!

Merry Christmas!

As the holiday season fills the air with joy and warmth, I want to take a moment to wish you and your loved ones a truly wonderful Christmas. May your days be filled with laughter, love, and cherished moments that become lifelong memories.

This is a season to celebrate the beauty of togetherness, the joy of giving, and the magic of hope. Whether you’re surrounded by family, friends, or simply the quiet comfort of reflection, I hope your heart feels full and your spirit renewed.

Thank you for being part of my life—it’s a gift I treasure more than words can say. Here’s to a holiday filled with peace, happiness, and the special kind of magic that only Christmas can bring.

With love and warm wishes,
Laura

merry christmas | lookingjoligood.wordpress.com
Lifestyle

Sopapilla Cheesecake Bars (Crescent Roll Cheesecake)

Sopapilla is a traditional fried pastry that originated in Latin American and Southwestern U.S. cuisine. It is typically made from a simple dough of flour, water, and a leavening agent like baking powder, which is then rolled out, cut into squares or triangles, and deep-fried until golden and puffy.When fried, sopapillas develop a hollow interior, making them perfect for filling with sweet or savory ingredients.

Sopapilla and Cheesecake | lookingjoligood.blog
this photo is from the Pillsbury website

This recipe is a combination of Sopapilla and Cheesecake! Sopapilla Cheesecake Bars are a delicious dessert that combines the flavors of sopapillas and cheesecake. This simple recipe comes together in just 15 minutes of prep time, thanks to the convenient shortcut of using Pillsbury refrigerated crescent dinner rolls.I like to make this the night before and serve it while opening gifts on Christmas morning. It is a simple yet delicious breakfast . Here’s how to make them:

Ingredients

  • 2 cans (8 oz each) refrigerated Pillsbury™ Original Crescent Rolls
  • 2 packages (8 oz each) cream cheese, softened
  • 1 ½ cups granulated sugar, divided
  • 1 teaspoon vanilla extract
  • ½ cup butter, melted
  • 1 tablespoon ground cinnamon

Instructions

this photo is from the Pillsbury website
  1. Preheat the Oven: Preheat your oven to 350°F (175°C).
  2. Prepare the Baking Dish: Unroll one can of crescent rolls and place it in the bottom of an ungreased 13×9-inch baking dish. Stretch the dough to cover the bottom, pressing the perforations to seal.
  3. Make the Cream Cheese Filling: In a medium bowl, beat the softened cream cheese with 1 cup of the sugar and the vanilla extract until smooth.
  4. Spread the Filling: Pour the cream cheese mixture over the crescent roll layer in the baking dish, spreading it evenly.
  5. Top with Second Layer of Dough: Unroll the second can of crescent rolls and place it on top of the cream cheese layer. Pinch seams together to seal.
  6. Add Toppings: Drizzle the melted butter evenly over the top layer of dough. In a small bowl, mix the remaining ½ cup of sugar with the cinnamon and sprinkle this mixture over the butter.
  7. Bake: Bake in the preheated oven for 30-35 minutes or until the bars are set and lightly golden brown.
  8. Cool and Serve: Let cool for about 30 minutes before cutting into squares. For easier cutting, refrigerate for a bit before serving.
Sopapilla and Cheesecake | lookingjoligood.blog
This photo is from the Pillsbury website

These bars can be served warm, chilled, or at room temperature. I prefer to eat them warm. You can add a little pizzazz by drizzling them with honey, melted chocolate, caramel or Nutella! Enjoy your delicious Sopapilla Cheesecake Bars!

Tips: This sopapilla cheesecake dessert needs to be stored in the refrigerator. To rewarm, microwave on 50% power 5 to 10 seconds.

Link to Pillsbury’s recipe: https://www.pillsbury.com/recipes/sopapilla-cheesecake-bars/65ec128f-2acc-417b-8745-06c182d3134a

Laura lookingjoligood.wordpress.com
Lifestyle

Crockpot Tortellini Soup with Sausage

I always tackle all my food prep for the holiday in one go on the day before, so everything is ready to roll when the day arrives. There’s something so nice about having dinner simmering away in the crockpot while you’re busy with all the holiday cooking prep! Knowing a warm, hearty meal is already taken care of makes the food prep feel a little more stress-free! This comforting slow-cooker soup features Italian sausage, tomatoes, cheese tortellini, spinach, and a touch of cream for a hearty and satisfying meal. It tastes even better the next day served as leftovers.

Prep Time: 20 minutes
Cook Time: 8 hours
Total Time: 8 hours 20 minutes
Servings: 6

Crockpot Tortellini Soup with Sausage | lookingjoligood.blog

Ingredients

  • 16 ounces Italian sausage (ground or casings removed; spicy or mild)
  • 1/2 medium onion, chopped
  • 4 cloves garlic, minced
  • 2 medium carrots, sliced or chopped
  • 2 celery stalks, finely chopped
  • 1 (28-ounce) can crushed tomatoes
  • 1 (14-ounce) can diced tomatoes with juices
  • 4 cups chicken broth (use bone broth for extra protein)
  • 2 (9-ounce) packages refrigerated cheese tortellini
  • 3/4 cup heavy cream (optional, but i definitely recommend it!)
  • 2 cups packed fresh baby spinach
  • Salt and pepper, to taste

Instructions

  1. Cook Sausage and Onions:
    Heat a skillet over medium heat. Add the sausage and onion, cooking for 7–8 minutes while breaking up the sausage with a spoon. Cook until browned, then drain excess fat if needed.
  2. Add Garlic:
    Stir in the minced garlic and cook for 30 seconds, until fragrant. Transfer the sausage mixture to the Crockpot.
  3. Add Vegetables and Broth:
    Add the carrots, celery, crushed tomatoes, diced tomatoes, and chicken broth to the Crockpot.
    • For a quick cook (3–4 hours on high), finely chop the carrots.
    • For a longer cook (7–8 hours on low or 4–5 hours on high), chop the carrots into larger pieces.
  4. Add Tortellini and Cream:
    About 30 minutes before serving, add the tortellini, spinach, and heavy cream (if using). Stir occasionally and set the Crockpot to “high” if it isn’t already.
  5. Season and Serve:
    Season with salt and pepper to taste. Serve immediately while the tortellini is tender. Serve with crusty bread or ritz crackers.

Notes

  • Use ground sausage or remove the meat from sausage casings. Spicy sausage adds a nice kick!
  • This soup is best fresh, as the tortellini can absorb the broth over time (Personally, I like it like that, but some people may not). Add extra chicken broth when reheating or cook the tortellini fresh if you plan on having leftovers.
  • A 7-quart Crockpot is ideal for this recipe, as the tortellini will nearly fill the pot.

Enjoy this hearty, flavorful soup that’s perfect for busy days or chilly nights!

Laura lookingjoligood.wordpress.com
Delicious Recipes

Winter Berry Spinach Salad

Winter Berry Spinach Salad | lookingjoligood.blog

Most of the recipes I have been sharing recently are rich and decadent. Today’s recipe for Winter Berry Spinach Salad is on the healthier side with a delightful mix of fresh, vibrant ingredients that are both nutritious and satisfying. The crisp spinach, sweet-tart cranberries, juicy strawberries, and crunchy candied pecans come together beautifully, while the creamy feta and tangy balsamic dressing add a burst of flavor. This salad not only complements richer holiday dishes but also provides a refreshing and wholesome balance to the table.

Winter Berry Spinach Salad

Ingredients:

Winter Berry Spinach Salad | lookingjoligood.blog
  • 8 cups fresh spinach or mixed greens
  • 1 cup fresh cranberries or dried cranberries
  • 1 cup fresh strawberries, sliced
  • 1/2 cup candied pecans or walnuts
  • 1/4 cup red onion, thinly sliced
  • 1/2 cup crumbled feta cheese
  • blueberries or pomegranate arils for extra festivity (optional)

Dressing:

  • 1/4 cup balsamic vinegar
  • 2 tbsp honey or maple syrup
  • 1/3 cup olive oil
  • 1 tsp Dijon mustard
  • Salt and pepper to taste

Directions:

  1. Prepare the Salad: In a large bowl, combine spinach, cranberries, strawberries, nuts, onion, and feta.
  2. Make the Dressing: Whisk together balsamic vinegar, honey, olive oil, mustard, salt, and pepper until emulsified.
  3. Toss & Serve: Drizzle the dressing over the salad just before serving and toss lightly. You can also serve the dressing on the side.

This salad is vibrant, full of flavor, and pairs wonderfully with any meal you’ve planned. The colors make it especially festive for Christmas!

Enjoy!

Laura lookingjoligood.wordpress.com
Delicious Recipes

Saltine Cracker Toffee

I remember as a child a classmate would bring homemade Saltine Cracker Toffee to our class parties and special occasions. The combination of the crispy crackers, rich caramel, and smooth chocolate was irresistible, especially since caramel has always been a favorite of mine.

This easy and irresistible treat combines crunchy saltine crackers with rich toffee, melted chocolate. Perfect for sharing at a holiday get together or gifting in festive tins during the holidays!

Prep Time: 30 minutes
Total Time: 2 hours 50 minutes
Servings: 32

Ingredients

Saltine Cracker Toffee | lookingjoligood.blog
  • 1 sleeve saltine crackers
  • 1 cup butter
  • 1 cup granulated sugar
  • 1/2 teaspoon salt
  • 1 teaspoon vanilla extract
  • 1 bag (11.5 oz) milk chocolate chips (about 2 cups)
  • 1 tablespoon candy sprinkles

Instructions

Step 1:
Preheat your oven to 350°F (175°C). Line a 15x10x1-inch baking pan with aluminum foil and coat the foil with cooking spray. Arrange the saltine crackers in a single layer on the pan.

Step 2:
In a 2-quart saucepan, melt the butter over medium heat. Add the sugar and salt, stirring frequently until the mixture reaches a boil. Continue boiling for 7 to 9 minutes, stirring often, until the mixture turns a light brown color. Remove from heat and stir in the vanilla extract. Immediately pour the toffee mixture over the crackers, spreading it evenly.

Step 3:
Bake for 13 to 15 minutes, or until the toffee is bubbly and golden brown. Remove the pan from the oven and sprinkle the chocolate chips over the top. Let them sit for 5 minutes to soften, then spread the melted chocolate evenly over the toffee. Top with candy sprinkles.

Step 4:
Allow the toffee to cool completely at room temperature, about 2 hours, or until the chocolate is firm. Break into pieces and enjoy. Store in an airtight container in the refrigerator for up to 1 week.

Variation Idea:
For a delicious twist, substitute the saltines with graham crackers, use packed dark brown sugar instead of granulated sugar, skip the chocolate chips, and sprinkle with chopped pecans instead

Saltine Cracker Toffee | lookingjoligood.blog

Enjoy!

Laura lookingjoligood.wordpress.com
Delicious Recipes

Coffee Punch

Smooth, creamy, and irresistible—this is the ultimate treat for special occasions! I discovered this recipe years ago and first made it for a church function, it was a crowd pleaser. Having a sweet tooth, I instantly fell in love with how rich and creamy it was! Since then, I’ve made it many times, and it’s always a hit. This drink is so indulgent it can even double as a dessert. If you prefer, you can use decaf coffee to make it.Make your punch bowl look extra festive by drizzling chocolate and or caramel syrup along the inside before adding the coffee punch.

Prep Time: 10 minutes
Chill Time: 30 minutes (or overnight)
Total Time: 40 minutes
Servings: 20
Yield: 1 large punch bowl

Ingredients

  • 2 cups boiling water
  • 1 cup white sugar
  • 1 (2-ounce) jar instant coffee granules (e.g., Nescafe®)
  • 1 gallon 2% milk
  • ½ gallon vanilla ice cream
  • ½ gallon chocolate ice cream

Instructions

  1. Prepare the Coffee Base
    In a large bowl, combine the boiling water, sugar, and instant coffee granules. Stir until the sugar and coffee are fully dissolved. Refrigerate for at least 30 minutes or up to overnight to chill.
  2. Assemble the Punch
    Transfer the chilled coffee mixture to a large punch bowl. Add the milk, vanilla ice cream, and chocolate ice cream.
  3. Mix and Serve
    Gently stir the punch until the ice cream starts to melt, creating a creamy and frothy consistency. Serve immediately.

Enjoy this crowd-pleasing, indulgent coffee punch at your next gathering!

Laura lookingjoligood.wordpress.com
Lifestyle

Mini Cheesecakes with Homemade Graham Cracker Crust Recipe

These Mini Cheesecakes feature a delicious homemade graham cracker crust and a smooth, creamy cheesecake filling. They are perfect for parties or as a delicious treat!

Mini Cheesecakes with Homemade Graham Cracker Crust Recipe | lookingjoligood.blog

Ingredients

For the Graham Cracker Crust:

  • 1 cup (120 grams) graham cracker crumbs (about 8 full sheets)
  • 3 tablespoons (40 grams) granulated sugar
  • 3 ½ tablespoons (50 grams) unsalted butter, melted

For the Cheesecake Filling:

  • 16 ounces (452 grams) cream cheese, softened to room temperature
  • ½ cup (100 grams) granulated sugar
  • 2 large eggs, at room temperature
  • 1 teaspoon pure vanilla extract
  • ⅓ cup (80 grams) sour cream, at room temperature

Instructions

Mini Cheesecakes with Homemade Graham Cracker Crust Recipe | lookingjoligood.blog
  1. Preheat the Oven: Preheat your oven to 350°F (175°C). Line a muffin tin with cupcake liners.
  2. Make the Graham Cracker Crust:
  • In a medium bowl, combine the graham cracker crumbs, sugar, and melted butter. Mix until the crumbs are evenly moistened and resemble wet sand.
  • Evenly distribute the crust mixture into the lined muffin cups, pressing it down firmly to form an even layer.
  • Bake the crusts for about 5 minutes or until lightly golden. Remove from the oven and set aside to cool slightly.
  1. Prepare the Cheesecake Filling:
  • In a large mixing bowl, beat the softened cream cheese with an electric mixer until smooth and creamy.
  • Add the granulated sugar and mix until well combined.
  • Add the eggs one at a time, mixing well after each addition. Then stir in the vanilla extract and sour cream until smooth.
  1. Assemble and Bake:
  • Spoon the cheesecake filling over the cooled crusts in each muffin cup, filling them about ¾ full.
  • Bake for 18-20 minutes or until the centers are set but still slightly jiggly.
  1. Cool and Serve:
  • Allow the mini cheesecakes to cool in the pan for about 10 minutes before transferring them to a wire rack to cool completely.
  • Refrigerate for at least 2 hours before serving. Optionally, top with fresh fruit, whipped cream, or chocolate sauce before serving. (personally I plan to top mine with Bonne Maman Lemon Curd and Bonne Maman Wild Blueberry Preserves, so delicious!)
Mini Cheesecakes with Homemade Graham Cracker Crust Recipe | lookingjoligood.blog

These mini cheesecakes are not only easy to make but also versatile in terms of toppings! Enjoy your delicious homemade treats!

Here is an affiliate link for Bonne Maman Wild Blueberry Preserves https://go.magik.ly/ml/28blj/

I have made these before using a similar recipe by the website Live Well Bake Often: https://www.livewellbakeoften.com/mini-cheesecakes/

Laura lookingjoligood.wordpress.com

**An affiliate link is a unique URL provided by an affiliate program or network to their partners, such as bloggers or website owners. When someone clicks on an affiliate link and makes a purchase or completes a desired action, the affiliate partner earns a commission or other form of compensation. These links are specifically tracked to attribute sales or conversions generated through the partner’s promotional efforts. In summary, an affiliate link is a specialized link that allows partners to earn commissions by driving traffic and sales to a particular product or service.**

Delicious Recipes

Million Dollar Dip

Last Christmas, my mother-in-law served this Million Dollar Dip, and it was an instant hit. My kids loved it so much that they not only ate a ton of it on Christmas day, they now ask me to make it regularly. It has quickly become a favorite! The original recipe is from Better Homes and Gardens.

Million Dollar Dip | lookingjoligood.blog
This image is from Better Homes and Gardens

Ingredients

  • 8 ounces cream cheese, softened
  • 3/4 cup sour cream
  • 3/4 cup mayonnaise
  • 1/4 teaspoon garlic powder
  • 1/4 teaspoon onion powder
  • 3/4 cup chopped cooked bacon (about 8 slices)
  • 1/2 cup chopped green onions
  • 1/2 cup toasted slivered almonds
  • 8 ounces sharp cheddar cheese, shredded (about 2 cups)

Instructions

  1. Prepare the Creamy Base
    In a large mixing bowl, beat the softened cream cheese on low speed until smooth. Add the sour cream, mayonnaise, garlic powder, and onion powder, and continue mixing until well combined.
  2. Incorporate the Mix-Ins
    Reserve 1–2 tablespoons each of bacon, green onions, and almonds for garnish. Add the remaining bacon, green onions, almonds, and shredded cheddar cheese to the creamy mixture. Stir until everything is evenly distributed.
  3. Toast the Almonds (Optional)
    To toast the almonds, heat a dry skillet over medium heat. Add the slivered almonds and cook for 5–7 minutes, stirring frequently, until they turn golden brown and release a nutty aroma.
  4. Finish and Serve
    Transfer the dip to a serving dish and sprinkle the reserved bacon, green onions, and almonds on top for added texture and flavor. Serve with crackers, corn chips, pretzel chips or cut up veggies.

Storage Tips
Store leftover dip in an airtight container in the refrigerator for up to 3 days. Freezing is not recommended, as it may alter the dip’s texture.

Million Dollar Dip | lookingjoligood.blog
This image is from Better Homes and Gardens

Link to the Better Homes and Gardens Million Dollar Dip Recipe: https://www.bhg.com/million-dollar-dip-7968536

I’m also interested in checking out Better Homes and Gardens “21 Make-Ahead Dips No One Will Be Able to Resist Dunking Into” Here is the link for that: https://www.bhg.com/recipes/party/appetizers/make-ahead-dips/

Enjoy your Million Dollar Dip!

Laura lookingjoligood.wordpress.com
Delicious Recipes

Monkey Bread Recipe

This easy Monkey Bread is a delicious, pull-apart treat that combines the sweetness of cinnamon and sugar with buttery biscuit dough. This monkey bread is perfect for breakfast, brunch, or as a sweet snack, and it’s sure to be a hit with everyone! Here’s how to make it using Pillsbury refrigerated biscuits.

monkey bread | lookingjoligood.blog

Ingredients

  • 1/2 cup granulated sugar
  • 1 teaspoon ground cinnamon
  • 2 cans (16.3 oz each) refrigerated Pillsbury™ Grands!™ Flaky Layers Original Biscuits (8 count)
  • 3/4 cup packed brown sugar
  • 1/2 cup butter or margarine, melted

Instructions

  1. Preheat the Oven: Preheat your oven to 350°F (175°C). Generously grease a 12-cup fluted tube pan (Bundt pan) with cooking spray.
  2. Prepare the Cinnamon Sugar: In a large plastic food storage bag, combine the granulated sugar and ground cinnamon.
  3. Cut the Biscuits: Separate the biscuit dough into individual biscuits. Cut each biscuit into quarters.
  4. Coat the Biscuit Pieces: Add the quartered biscuit pieces to the bag with the cinnamon sugar mixture. Seal the bag and shake until all pieces are well coated.
  5. Layer in the Pan: Arrange the coated biscuit pieces in the prepared pan, layering them evenly.
  6. Make the Butter and Brown Sugar Mixture: In a small bowl, mix together the melted butter and packed brown sugar until well combined. Pour this mixture evenly over the biscuit pieces in the pan.
  7. Bake: Bake in the preheated oven for 30 to 40 minutes or until golden brown and no longer doughy in the center.
  8. Cool and Serve: Allow the monkey bread to cool in the pan for about 5 minutes. Carefully invert it onto a heatproof plate or serving platter. Serve warm, pulling apart pieces to enjoy!

Enjoy your delicious homemade treat!

monkey bread | lookingjoligood.blog

Here is a link to the Pillsbury Monkey bread recipe
https://www.pillsbury.com/recipes/sweet-and-sticky-monkey-bread/9e6e78e1-f715-47d5-9b5b-ecb4c754a1f7
https://www.pillsbury.com/recipes/monkey-bread-with-caramel/4a92932f-f795-4813-9800-d6e35e8d5a49

Laura lookingjoligood.wordpress.com