Tips and Tricks

Tip Tuesday #10

Tip Tuesday: Make up tips and tricks every Tuesday | lookingjoligood.wordpress.com

Here is another tip for Tip Tuesday…

I seriously hate it when I am trying to sharpen a makeup pencil and it keeps breaking!!!  (I hate wasting the product in a sharpener!) To prevent this from happening I put it in the freezer 30 minutes before I want to sharpen it. This simple trick helps to makes the tip less likely to crumble and break. If you are going to use the liner right after sharpening just soften it up a bit by drawing a quick line or two on the back of your hand.

Tip Tuesday...| lookingjoligood.wordpress.com

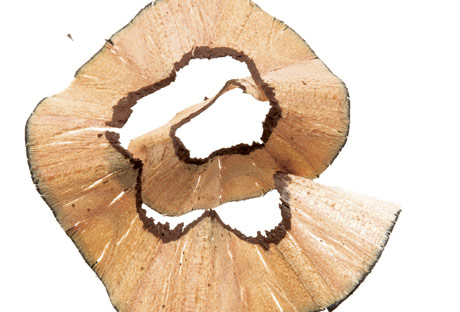
I tend to set aside a time to sharpen all my dull liners at the same time, so I will throw them all into the freezer at the same time and set a timer for 30 minutes and then sharpen them all at once

lookingjoligood.wordpress.com

I’d love for you to follow me on Instagram Lookingjoligood and on Facebook Lookin Joli Good!

Tips and Tricks

Tip Tuesday #9

Tip Tuesday Make up tips and tricks every Tuesday | lookingjoligood.wordpress.com

Here is another tip for Tip Tuesday…

I always tend to apply my foundation and concealer first and then my eye makeup. Unfortunately, this often results in fall out creating what looks like dark shadows under my eyes (not the look I am going for!)

Tip Tuesday...| lookingjoligood.wordpress.com

 Instead, after my foundation, I have recently been starting with eye makeup and then applying my concealer afterwards. That way, I can easily clean up any eye shadow that falls below my eyes. I also soak a cotton swab or two in makeup remover to have on hand to quickly and easily clean up any of the left over fall out. To finish, I apply my concealer under my eyes for a bright perfect under eye area.

lookingjoligood.wordpress.com

I’d love for you to follow me on Instagram Lookingjoligood and on Facebook Lookin Joli Good!

Tips and Tricks

Tip Tuesday #8

Tip Tuesday: Make up tips and tricks every Tuesday | lookingjoligood.wordpress.com

Here is another quick tip for Tip Tuesdays…

Think outside the makeup box

Tip Tuesday Taupe Eyeshadow | lookingjoligood.wordpress.com

Invest in a good matte taupe eye shadow like Urban Decay Buck, Bobbie Brown Taupe, The Balm Matt Patel from the Meet Matte palette, or one of my favorites Taupe from the Lorac Pro Palette.  You don’t just have to use that matte taupe eye shadow in your crease or on your eyelids.  You can use a matte taupe eye shadow to fill in brows, line eyes, and even blend under your cheekbones for a quick and easy contour.

lookingjoligood.wordpress.com

PS: No affiliate links in this post, just a bunch of links to help you know what types of shadows I am talking about 😉

I’d love for you to follow me on Instagram Lookingjoligood and on Facebook Lookin Joli Good!

Tips and Tricks

Tip Tuesday #7

Tip Tuesday Make up tips and tricks every Tuesday | lookingjoligood.wordpress.com

Have you seen that Biore recently release a Baking Soda Pore Cleanser?  You don’t need to pay $7 for the benefits* that you can receive from a $0.52 box of baking soda.

Make your own baking soda pore cleanser by mixing plain old baking soda and water until it forms a paste.

Tip Tuesday Baking Powder Cleanser | lookingjoligood.wordpress.com

Wet your face with warm water. Dip your fingers into the baking soda paste. Apply the paste to your wet face using a gentle circular motion. Cover your entire face with the paste. Avoiding the eye area.  Rinse your face thoroughly with warm water. Pat your face dry with a clean towel.  It is as simple as that.

You can also spruce it up by mixing it with organic coconut, olive, or grapeseed oil or with Witch Hazel.

**Be sure to avoid eye contact!**

I’d love for you to follow me on Instagram Lookingjoligood and on Facebook Lookin Joli Good!


lookingjoligood.wordpress.com


*Biore baking soda pore cleanser does contain other ingredients: WATER, GLYCERIN, SORBITOL, SODIUM LAURETH SULFATE, COCAMIDOPROPYL BETAINE, LAURETH-4 CARBOXYLIC ACID, ETHYLHEXYLGLYCERIN, JOJOBA ESTERS, ACRYLATES/C10-30 ALKYL ACRYLATE CROSSPOLYMER, SODIUM BENZOATE, SALICYLIC ACID, CITRIC ACID, FRAGRANCE, SODIUM BICARBONATE, SODIUM HYDROXIDE, POLYQUATERNIUM-39, DISODIUM EDTA, .

Make up · Tips and Tricks

Tip Tuesday #6

Tip Tuesday: Make up tips and tricks every Tuesday | lookingjoligood.wordpress.com

Here is another tip for Tip Tuesdays…

On quick “5 Minute Makeup” or “No Makeup Makeup” days all you need is blush, mascara, lipgloss, and bronzer!

When I want to look natural or get ready quickly, I love to sweep a bit of bronzer into my crease.  It adds some nice depth without taking a lot of time or having to use eyeshadow.

Let me know what you think if you try it out!

lookingjoligood.wordpress.com

I’d love for you to follow me on Instagram Lookingjoligood and on Facebook Lookin Joli Good

Make up · Tips and Tricks

Tip Tuesday #5

Tip Tuesday Make up tips and tricks every Tuesday | lookingjoligood.wordpress.com

Here is another tip for Tip Tuesdays…

Has your mascara ever dried out before it has run out or expired?  These are two ways that you can you can easily revive it!

First add 2-3 drops of saline solution eye drops into the tube, recover, and roll it between your hands.  Magically your mascara will be usable again.

Tip Tuesday Make up tips and tricks every Tuesday | lookingjoligood.wordpress.com

Don’t have any saline solution eye drops?  Put your tightly closed dried up mascara tube into a mug of hot water for 3-5 minutes.  Check your mascara, most likely it will be nice and smooth again, if not reheat your water and let it sit another 3-5 minutes!

Tip Tuesday Make up tips and tricks every Tuesday | lookingjoligood.wordpress.com

I’d love for you to follow me on Instagram Lookingjoligood and on Facebook Lookin Joli Good!

lookingjoligood.wordpress.com

Make up · Tips and Tricks

Bronzer 101

Let’s face it, about this time of year, if you live in the North East like I do you are probably a bit Vitamin D deficient!  While I can’t help you with that, I can give you a few tips on how to look like you have just returned from a stay at the beach.

Adding life to your face can be as simple as using bronzer!

While using bronzer to add color is a simple step, proper application isn’t always as simple.  Keep in mind that the goal is to add color, but not to give the appearance of an all over tan. Bronzer should be applied where the sun would naturally hit the face, the forehead, the cheeks, and the nose.

Bronzer is applied after your foundation and concealer have been put on. Choose a bronzer that works with you skin tone.  To apply find the apple of the cheek by smiling and lightly dust your cheeks with the bronzer. Then using a wide brush blend up and blend down.  You can put blush on top of it and even a little bit of shimmer and highlight on top as well.

Bronzing vs Contour | lookingjoligood.wordpress.com
Don’t confuse bronzing your face with contouring.  These are two different techniques.

While bronzer is probably the quickest way to add some color and life to your face, a little bronzer can go a long way, remember that you can always add more, so start off lightly and build it up as needed.

lookingjoligood.wordpress.com

I’d love for you to follow me on Instagram Lookingjoligood and on Facebook Lookin Joli Good!

Hello Bronzer! | lookingjoligood.wordpress.com
This is not the effect you are wanting to achieve with bronzer! (This is not my photo, I just googled bronzer overload and this was one of the first pictures that came up. )
Make up · Tips and Tricks

Tip Tuesday #4

Tip Tuesday: Make up tips and tricks every Tuesday | lookingjoligood.wordpress.com

Here is another tip for Tip Tuesdays…

Lining the inner rim of the eye is beautiful but it is a bit high maintenance.  Unfortunately, you will always have to touch it up as needed throughout the day, but there are a few ways to extend the wear time of the eye liner when lining the water line or tight lining. First of all, always use a waterproof liner in the waterline. (My all time favorite is Scandaleyes waterproof kohl liner by Rimmel.)  Secondly, before applying the liner, use a q-tip cotton swab to dry off the area you are about to line. Q-tips are perfect for using throughout the day as well to clean up the buildup that often collects in the tear ducts. (I hate when that happens!)  Thirdly, if you tend to have very watery eyes, you may want skip lining the waterline all together, but if not, apply the liner to your waterline with your head tilted back with your mouth closed while breathing deeply through your nose.  This helps those tears to go into the sinuses and not out onto the eyes and down the cheeks.

Let me know if you try out this tip and if it works for you!

lookingjoligood.wordpress.com

I’d love for you to follow me on Instagram Lookingjoligood and on Facebook Lookin Joli Good!

Make up · Tips and Tricks

Tip Tuesday #3

Tip Tuesday Make up tips and tricks every Tuesday | lookingjoligood.wordpress.com

Sometime making little changes can make a big difference in you makeup/beauty routine.

Here is another tip for Tip Tuesdays…

When applying eyeshadow into the crease, instead of looking straight on into the mirror, tilt your head back and look down into the mirror.  Just moving your head into this different position will help you to visualize the eye bone better giving you a better guide where to add your crease color.

This tip is also helpful for when you are applying eyeliner as well as false lashes.  You can better visualize where you want to add the liner and the lashes by tilting your head back and looking into the mirror at this different angle.

If you try out this tip, I’d love to hear how it works for you!

lookingjoligood.wordpress.com

I’d love for you to follow me on Instagram Lookingjoligood and on Facebook Lookin Joli Good

Make up · Tips and Tricks

Tip Tuesday #1

I’m going to be starting a new series called…Tip Tuesdays!

Tip Tuesday Make up tips and tricks every Tuesday | lookingjoligood.wordpress.com

I hope to give you some little tips and tricks that help to make a big difference in your daily makeup/beauty routine!

Tip #1: If you want your eyeshadow to blend more evenly and easily without creasing or fading, you need to try this tip:

Working one eye at a time, prime your eyelid with an eye primer, paint pot, or even use concealer or just your foundation.  Then immediately set with a translucent powder.  

When you go to apply your eye shadows you will notice how much more easily they will apply.

This little step will create a smoother canvas on your eyelid to lay down your colors.  You’ll be amazed at how even cheaper, harder to work with shadows will blend more easily.

Give it a try and let me know what you think!

lookingjoligood.wordpress.com